Showing posts with label Photo Tips. Show all posts

Sunday, July 21, 2013

Hummingbird Photography-PhotoTips


Photographing Hummingbirds
plus Photo Tips for Fast Action Photography

A Day of Fun and Learning

-         Hummingbird Photography Workshops by Judy Bingman and Meggi Raeder


As the sun rose, it promised to be a clear and warm day in the Santa Cruz Mountains.  As we were getting ready filling up all hummingbird feeders, the tiny birds were right there to get their breakfast.  It is so amazing how they buzz around the feeders, sharing each one with many other of their ‘relatives’.  Different from my garden in Palo Alto, where I often have one dominant male that might not want to share ‘his’ feeder with anyone else.


In Judy’s garden in the Santa Cruz Mountains, there are about 10+ feeders in various locations among the red hot pokers (also known as Torch Lily, Kniphofia/Red Hot Poker Lilies), lantana, and other flowering, nectar-carrying plants that all attract hummingbirds.

By 8am, our group of 6 photographers participating in the workshop arrived and set up their cameras and lenses to get ready for a day of fun and learning.   To get everyone started, we first discussed some of the behaviors of these tiny flying ‘machines’.   Weighing approximately 0.1 ounce and being the tiniest birds, they are strong and enduring during their migration from the northern areas to the southern hemisphere where they over-winter.  Amazingly, hummingbirds beat their wings at a rate of 40-80 per second and they can fly up to 30 miles per hour.  Some hummingbird species cross the Gulf of Mexico on their migration route to Florida without being able to land [in contrast to the shorebirds that can always rest on the water].  Their heart beat is very fast at 500-1200 beats per minute to create the energy – yet at night when they rest perched on trees or nests, it drops to ~50 beats to conserve energy.  Due to all of this energy consumption, they need to feed continuously on nectar or insects (protein source) that they catch in flight. 

The most striking features of hummingbirds are their iridescent plumage, particularly on the neck.  There are New World most of which are found in the tropics.  In all of North America, about 112 species have been observed, with 26 in Mexico, 17 in the USA and Canada.  In California, about 12 species have been reported and in the Bayarea the Anna and Allen Hummingbird are the most seen in our local backyards, with an occasional Rufus passing by.  In the Santa Cruz Mountains, the hummingbirds have been seen all winter if there is a food source.  With feeders provided, one might see the birds all year round.
about 340 species of hummingbirds in the

Observation, Practice and Patience

As in all wildlife photography, before setting up the equipment and starting photographing, it is very important to observe and learn the behavior and movement of the subjects to be able to anticipate what actions they will take.  For our hummingbirds, we studied their approach to the feeders to be able to capture them on and off the feeders.  By knowing that the birds will approach the feeder usually from 1 or 2 directions, and once landed often will go on and off the feeder several times, it is possible to capture their different body postures including the interesting tail flaring when they interact with other birds on or near the feeder.


A Day of Fun and Learning

After everyone was set up, quiet descended over the garden as we all were concentrating on the hummingbirds.  Participants migrated from one feeder to the next with different angles to the sun and backdrops to try different overall compositions.  In the afternoon heat, we all gathered on the shaded porch and photographed from there escaping the hot afternoon sun.
Without fail, during the day everyone captured the fascinating tiny hummingbirds and it is rewarding to see the outcome at the end of the workshop.  Here are some images from the workshops participants using varying tele lenses to capture these tiny birds: 


 Image by Susan

Image by Chris

Image by Jan - competition at the feeder

Image by Susan, titled: Hello there


 Image by Susan

Susan, who had attended a previous hummingbird workshop and who came back after renting a longer tele lens and equipment, was among the most dedicated and her perseverance sure paid off for her.  At home, Susan has a garden with native plants, and she photographs the birds and bees right from her desk where she writes poetry and novels for young reader.

She tells me:

“When I don't have a camera in my hand I am usually at the computer, working on poetry or my next novel for young people. And if I'm not there, I'm in my art studio working on my mixed-media pieces that usually combine my love of photography, dogs, and poetry. Nothing ever feels like work because I am always having so much fun. Breaks are strictly enforced by Zoey, my rescued white German Shepherd, with her frequent demands for walks, games of chase, and agility training.

You can find her work at these links:

Writing Website: http://www.susantaylorbrown.com
My Garden Blog: 
http://www.poppiness.com/
Zoey's Dog Blog: 
http://www.adoginmylife.com

At the end of the day, we were all exhausted but happy.  It is impossible not to smile at these tiny birds, how they are strong, territorial, defending their food source and yet when there are many around, they do share.


Before closing, I would like to share some of the Photo Tips that I prepare for my workshops participants in a Quick Guide so they can take it home and refer to it next time out in the field.   These photo tips are broadly applicable to any fast action photography in nature or also in sports, dance and other settings that require quick and continuous shooting:

Photo Tips for Hummingbirds, birds and other wildlife
[Fast Action Photography]

During my photographic journey I have  photographed wildlife during the last 7 years  – from big game in Africa, polar bears in Canada, grizzlies and bald eagles in Alaska to the raptors, shorebirds and the tiniest of hummingbirds - there are certain settings on the camera that will serve as a starting point when capturing of wildlife.  Since the movement can never be anticipated for certain, it is important to set the camera to a fast shutter speed and shallow depth of field (large aperture).  But first, let’s look at the equipment.


Camera Equipment I use:
Nikon D7000 (Dx format) and D700 (Fx format)
Tele lenses:  Nikkor 70-200mm, Nikkor 70-300mm and Nikkor 200-400mm lens (my favorite)
1.4x Nikon Teleconverter
Wimberley tripod head
Monfrotto Tripod (sturdy!)
Nikon SB800 flash with Better Beamer Flash extension (for further reach)
Quantum External Battery (to accommodate continuous flashing during continuous shooting)
Nikon Cable Release

Camera Settings – as starting point:
Here are my starting settings that will be varied according to the light, the size and speed of the wildlife that I am photographing, and the environment:

Shutter speed:  1/1000 or faster
Aperture:  f/6.3 or 7.1 [shallow depth of field to blur the background.  Note: with larger animals, an increase in depth of field might be required, e.g. f/8 or 10]
ISO dialed up to achieve these settings:  typically between 640 and 1250
-- [note with the newer cameras, higher ISO settings are quit acceptable due to low noise]

Depending on the light situation, I will add an external flash with a Better Beamer [essentially a Fresnel lens to extend the reach of the flash light] to create some fill flash light specifically if the sunlight is harsh and if the sun illuminates the scene in such a way that the animals are shaded towards the camera. 

Important:  When using a flash, it is imperative to set the camera on manual exposure mode to achieve the above settings.  To achieve the right additional light from the flash, I use the flash exposure compensation to (mostly) soften the flash light ( “-“ exposure adjustment).

Practice and Patience

I have not always been a patient person, but wildlife photography has taught me that patience is a necessary ingredient when trying to capture subjects that cannot be directed to perform!  When out in the field, I always schedule extra time – sometimes several extra days – to increase the potential for good images.  Not only the animals might be shy and elusive, but the weather is an important factor. [We are fortunate in California of having very stable great weather during most of the year.  But this is not the case in other locations!]

As for practice, even after many years of focusing on wildlife, after a period of time, I notice that the hand-eye coordination can get ‘rusty’.  To practice at the beginning of the season, I have my tripod and camera/lens at my back door and enjoy the hummingbirds and finches/titmouse/chickadee and other small birds and squirrels that come to my feeders in my garden.  Since the angle of view is very narrow when using a long tele lens (400mm and longer), coming prepared with a good sense of where your lens is pointing to capture a flying birds increases the success rate of getting good images.

Til next time,
Meggi

Go Out and Keep Shooting!       


 All images: Copyright M. Raeder-Photography unless otherwise specified.

Tuesday, June 4, 2013

Night over Bixby Bridge

Star Trails over Bixby Bridge
 - and Photo Tips

Bixby Bridge on Highway 1, CA, USA

In the summer, the California coast is typically foggy at the end of the day and catching the night sky this time of the year is a rare treat.  But the weather forecast predicted an inversion when the warm air mass from the inland areas pushes towards the coast keeping the fog at bay.


On May 31, the forecast was for such an off-shore wind with the promise of a clear night at the coast.  So, I packed my gear and headed out to photograph the historic Bixby Bridge at night.  The bridge offers a well worth daytime destination and even on a Friday afternoon, many cars stopped, people jumped out, took some photos and headed on to whatever their final destination was.

California Coast

I had come early to explore the surroundings by daylight since photographing the bridge towards the water and southern sky required getting off Highway 1 and heading for the hills on a dirt road.  I walked up with my small camera taking images along the way to see which spot offered the best vintage point.

Bixby Bridge

Then I enjoyed sunset over the ocean sitting back to wait for the stars to come out.  A bit of haze covered the ocean but the sky overhead seemed fairly clear.

Early Evening haze

Sunset over the Ocean


I have learned that when setting up for a night shoot it is always good to get to the favorite spot before darkness.  So I drove up to “my spot” only to find 2 other cars and 5 guys rearing up to jump from the bridge – yes, you read correctly, these young men planned to jump with parashoots from the bridge and they did!  All of this happened so fast that I only couldn’t get a shot as they vanished into the void beneath. I am not sure about the heights of the bridge but it is a long way down [280ft / 85m according to Wikipedia] About ½ hour later they had climbed up the gulch to their cars and after much laughter they were heading for Santa Cruz for a Friday night party on the beach.

As I was setting up my tripod, checking the setting of my camera for the star trails, a highway trooper pulled up next to my car asking me about ‘bridge jumpers’.  How did he know?  The happy guys were long gone?  He said they were always concerned for the safety of the jumpers and after a quick thinking on how to respond, I assured him that the guys were healthy and happy as they left.

The Blue Hour
Camera settings during the ‘blue hour’ right after sunset:   f/2.8;  1 second, ISO 400; lens at 17mm.

As night fell, this unusual clear evening proved to be the rare treat I had hoped for.

With sunset pretty late, I had to wait until after 9pm for the stars to come out but what a great night it was.  Not much wind and mild temperatures - however, experience has taught me never to leave my house without my trusted down jacket, hat and gloves, and a thermos of hot tea!

Once the stars were out, I let the camera do its job for the next hour+ and record the stars.  Even with the haze increasing the stars still sparkles in the sky and I let the calm of the night envelop me.

Star Trails over Bixby Bridge [looking south with the rotation around the Southern Cross]

2 hours later, this is my last images of the evening with millions of stars overhead.  And a ghostly glow from the cars as they rounded the next hillside.  

Midnight over the Ocean
Camera Settings:  f/2.8;  30 sec,  ISO 2000, lens at 17mm  (a bit of lightening in post-processing)

Driving home way after midnight, I couldn’t wait to see what my camera captured and voila – I am sharing it with all of you.

If you are inspired, go out at night and see how beautiful the night sky can be outside the city lights.  Please also watch for upcoming Photo Workshops on my Photo Workshop link and enjoy the Photo tips below.

Til next time,
Meggi.


Photo Tips:

Over the past 2 year I have learned a lot for some great night photographers, astro-photographers, astrolandscapephotographers, and others that love the night and I am thankful to Steven Christenson, Star Circle Academy, and Jon Fuller, Moab Photo Tours, for their insight and help.  For those who have never ventured out under the “dark sky” - not city sky – here are some tips to make beautiful night images:

  1. A sturdy tripod is a must;
  2. A DSRL that can be set to manual focus and to manual exposure since the ‘automatic’ settings are completely fooled at night.
  3. A cable release since any camera shake will blur your image with long exposure.
  4. Loaded batteries and extra batteries.  Memory cards.
  5. Any lens can capture the night but for the night sky, a wide angle lens is best to capture as much in your view finder as possible and still be able to compose with some landscape into the frame to make the image more interesting.
  6. Exposure:  to capture as much of the little light available, expose with a wide open lens at f/4 or wider.
  7. Shutter speed:  Due the earth rotation, the stars seem to move and thus an exposure above 30 seconds will give oval stars.  Thus, my shutter speed will be between 20-30 sec for capturing the night sky (star points).
  8. Due to the improved sensitivity of the newer DSLRs, the ISO can be set high, e.g. between 1600-3200, to allow enough light to be recorded for a starry night sky image.
  9. In camera noise reduction:  set to off! Specifically for star trails since the camera would take another ‘dark’ image for the same length of time, e.g. 20-30 second, during which no recording takes place when shooting continuously.
  10. To preserve battery power, turn off the ‘image review’ function.
  11. The last images above was taken at around midnight at the following settings:  :  f/2.8;  30 sec,  ISO 2000 (a bit of lightening in post-processing)


Monday, October 22, 2012

Cheetahs, Camels and Ostriches

Leaving only dust behind!
© M. Raeder-Photography


Cheetahs, Camels and Ostriches

In my recent Travel TidBits I wrote about the Great Reno Balloon Race and included a time-lapse video and still images of ~100 colorful hot air balloons – giving you a glimpse of being really in the midst of all the activities.  But this was not were the fun stopped during this Photo Workshop weekend, since we also were participating in good old fashion fun at the International Camel Races in Virginia City,  and fast action excitement out into the desert beyond Reno where we had the opportunity to see 2 cheetahs run at full speed.  This is definitely one of the best opportunities to see these magnificent animals run at 60 miles per hour outside Africa – and then in Africa running cheetahs are by no means guaranteed!

The International Camel Race in Virginia City

Virginia City is an old mining town south-east of Reno.  At its hay days, it was a bustling town and the city describes itself as follows:

Once a vital settlement between Denver and San Francisco, Virginia City influenced the entire country. During its boom time, Virginia City's mining proceeds amounted to millions of dollars, equaling billions today. Every inch of this picturesque, Victorian-era town, celebrates this colorful history. Stroll our authentic board sidewalks to Old West saloons, shops, museums, and restaurants. Or visit historic churches, 19th century homes, public buildings, and quaint cemeteries. Maybe it's a ride on a stagecoach, horse-drawn carriage, trolley, or the V&T Railroad steam engine train that crosses the high desert landscape dotted with old mines. Take your step back in time in Virginia City!

Now it is a sleepy town of about 500 inhabitants but when the International Camel Race comes to town, everybody is participating and hundreds of spectators come to see the festivities.  On a boiling hot afternoon, we waited in line for parking spots, stood in line for the tickets and it was a circus with the camel and ostriches as the main actors.

With the bleaches all packed with spectators, we found a spot above the race track with a good view of the fun below.

© M. Raeder-Photography

Off to a good start…

© M. Raeder-Photography

rounding the corner, one camel decided to turn back…

© M. Raeder-Photography

…and almost dumped its rider – hang on there!

And here come the ostriches:

© Lynda Sanders

© Lynda Sanders

… and the ostrich troop wanted to see what was going on!  Laughing at the riders that did not make the finish line – and many did not since the animals were exquisite in ‘loosing’ their riders and even going into a victory dance when the poor rider was on the ground.

The announcer was old fashioned and added running commentary to the amusement of the spectators!  It was truly like stepping back in time.  This was the entertainment from years back and it seems even the well-fed animals enjoyed the commotion.


Cheetahs:  The fastest animals on earth!

The next afternoon, we drove some 30 miles into the desert to the Animal Ark, an animal sanctuary that since over 20 years has provided a safe haven for injured, abandoned or otherwise un-releasable wildlife.  It is nestled into the desert hills on 38 acres and provides enclosures that include natural habitat and vegetation where the animals can rest under shade trees or hide under bushes simulating their natural behavior.

The Animal Ark also houses 3 cheetahs, ambassador animals that participate in a research program.  In captivity like zoos, cheetahs’ lifespan is shorter – about 7-8 years - than in the wild which is unusual given the care and lack of predators.  It has been found that the sedentary life might contribute to the earlier death of the animals.  At the Ark and other places, the cheetahs have the opportunity to run freely at full speed and it has been shown that this exercise prolongs the cheetah’s lifespan.  One of the animals at the Ark, a female cheetah, is 14 years of age, double the typical lifespan of cheetahs in captivity.  The 2 other male cheetahs are younger at an age of 8 years. Although public only several times during the year, the Ark animals run almost every week and seem to enjoy the activity and the reward at the end of the run:  a full bowl of fresh meat.

We toured the sanctuary, visited with the other animals housed in the desert landscape in natural habitat environments, and our excitement grew as the time for the cheetah run got closer.  We took our place along the u-shaped course along the bottom of the u-run.  As the first animal appeared quiet descended and everyone was concentrated to see and capture these fast moving animals.  Considering the less than 10-second run, being ready, camera on the right settings and concentrating on focusing on the animal is utmost important.  And then the sign was given and the first cheetah ‘flew’ towards us, turned the corner and traversed in front of the photographers to turn again to return to the starting point.  Cameras clicked, we exhaled and the run was over.  An exhilarating feeling to be part of such a rare event!

We had discussed all the tips and tricks of fast action photography prior to the event, and I am pleased to report that even those participants with no prior experience in this type of photography went home with excellent images.  But see for yourself:

Following the lure...
© Danielle Olander


© Jeff Johnson


© Yao-pi Hsu

© Larry Calof


A beautiful moment - off the ground.
© M. Raeder-Photography

It was a thrill to see the speed, the concentration and joyfulness of these beautiful animals free in the landscape.  They followed the lure which can be seen in the first image perfectly and knew that a hunk of meat awaited them at the finish line.  Well deserved, Cheetahs!

For those who liked to learn more about fast action photography  here are my tips published last year in October 2011 following my visit to capture the cheetah run:

Fast Action Photography Tips:
For those interested, I thought I would describe the camera settings for capturing fast moving objects.  This technique is often used in wildlife photography and I teach it in depth in my hummingbird workshops during the summer.

To obtain the shallow depth of field, I use f/7.1 and try to achieve a shutter speed of  1/1000 or shorter.  Depending on the light, this will necessitate dialing up the ISO to 640 - 1600 or more.  On our particular day in 2011 at the Animal Ark, we needed to shoot with ISO 2500 or more since a storm front was blowing through and the black clouds were gloomy.  To capture the fast moving cheetah sharp and in focus, set your camera on continuous focusing and either spot or dynamic focusing (this is a smaller focus area than the usual matrix focusing).  These are of course are the starting points and need to be adjusted in accordance to your histogram.  This might necessitate adding some exposure compensation to obtain the correct exposure.  So take some test shots before the action begins and adjust to the particular situation.  

Further, set you camera on 'burst' or 'continuous shooting' to capture the run.  Depending on your camera and your memory card writing speed, it might be advantageous to shoot in jpg fine (best quality) to maximize your buffer.

The challenge in our situation here at the cheetah run was that the action in each run was over in about 3-5 seconds and we had only a limited number of runs!  So being prepared, setting the camera well in advance and being ready was a must!


Til next time,
Meggi

If you would like to participate in this fast action photography challenge and see the cheetahs run, please consider my next photo workshop in Reno in September 2013:


Hot Air Balloon - inside
 ©M. Raeder-Photography
Reno Hot Air Balloon Festival 
September 6-9, 2013 
Cheetah Run, Reno
Sun, September 8, 2013

Here is an opportunity to see Hot Air Balloons rising into the early morning sky at dawn and then walk among the balloons as the remainder of the 100+ balloons are being set up for launch.  On Sunday, we photograph Cheetahs running at 60 miles per hour!  Best cheetah photo opportunity outside Africa!

Date: September 6-9, 2013
For all details, click here.


Friday, June 29, 2012

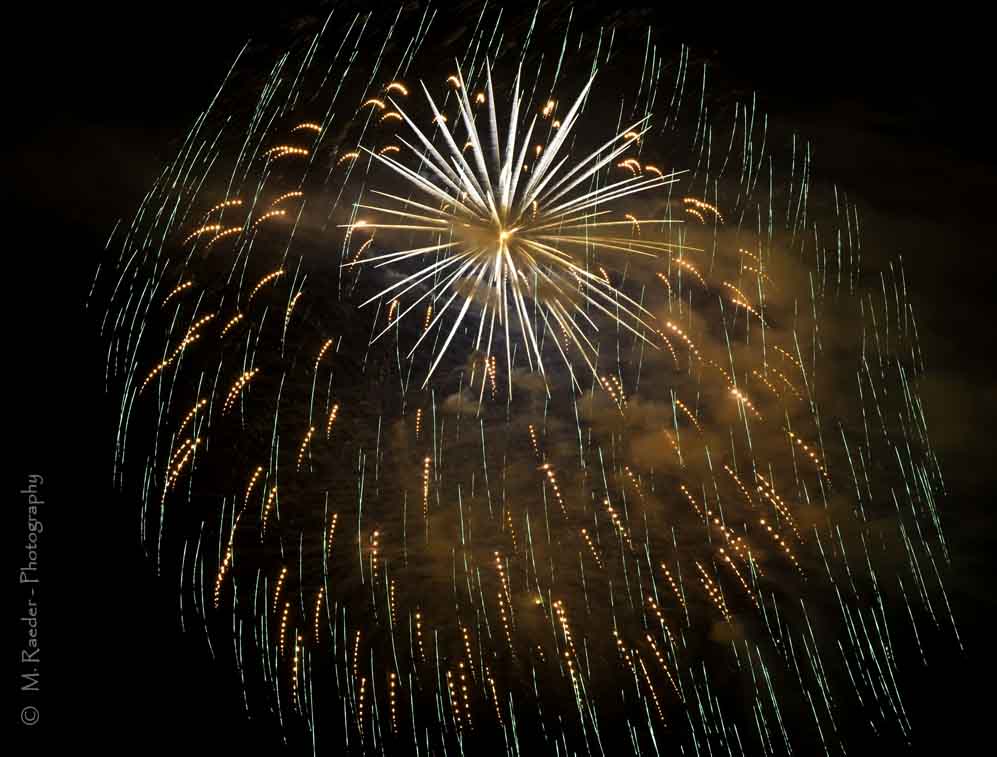
Capture the Fireworks like a Pro!


Capture the Fireworks like a Pro!

With 4rth of July approaching I was thinking of my plans to capture the fireworks next week.  Last year I had scouted our places around Shoreline, Mt View, and stationed myself close enough to fill my frames beautifully with the colors in the sky.  For my last years images, click here.  So for this year, I’ll be expanding on the fireworks theme and will add other elements when I capture the 4rth. Click here for my 2012 images.

If you plan to go out and try to capture the beauty of the 4rth at night, here are some photography tips how to successfully bring back stunning images.

The Photography Essentials:  your camera with manual controls, a wide angle lens or wide angle to medium tele zoom lens, a cable release or wireless release, a stop watch, a sturdy tripod. A piece of cardboard to cover your lens (see below “creative”), lens cloth, a flashlight.

Camera:  it is important to be able to manually control your exposure settings.  Since you want to capture the unfolding colors a longer exposure is necessary.  The camera should not have a lag time (a draw back for Point-and-Shoot cameras).

Shutter speed: Set your camera on manual and dial the shutter speed to bulb.  This will allow you to keep the shutter open for a manually determined time.  With your cable release you can then open the shutter with each new firework burst and leave it open until the colors fade.  Start with 3-5 seconds and experiment from there.

Aperture or f-stop:  Select ISO 100-200 and f/8 to f/16.  The smaller aperture (higher f-stop) intensifies the colors and prevents over exposure.  This is where you need to experiment between shots.

White Balance:  Choose Daylight as a starting point.  If you like warm colors, change to Clouds.

Focusing:  Set your camera lens on manual focus and focus on ‘infinity’.  Typically, there is a range in the infinity setting and it is important to review your image and maybe pull back just a tiny bit for finding the best “infinity’ point on your lens.

Noise Reduction:  Longer exposures can overheat your sensor and that leads to ‘noise’ in the image.  However, the noise reduction adds time to the ‘writing’ of the image on your memory card and you might decide to live with the noise for being able to shoot more rapidly during the ½ hour of the typical fireworks display.

Creative Images:  After photographing single blasts and being comfortable with the setting and the looks of your images, try to do a double exposure by opening your lens with the cable release but obscuring the lens with the cardboard.  Then with 2-3 consecutive blasts of colors, ‘open’ the lens by removing the cardboard and thus capturing more than 1 blast – experiment until you get the perfect amazing color show in the sky.  This is essentially a multi-exposure controlled by blocking and removing the cardboard from your lens.  See what amazing blasts you can capture.

Last but not least:  bring a blanket to sit on or a low chair, gather your friends and bring a picnic – after finding the perfect spot there is typically waiting until the show begins.  Munch away until the sky lights up!


Have a great 4rth!

Meggi


~~~~~~~~~~~~~~~~~~~~~~~~~~~~~~~~~~~~~~~~~~~~~~~~~~~~~~~~~~~~~~~~~~~~~~

"Only leaving dust behind"
New Cheetah Image - from last Sunday.

Only 3 'Photo-Blind' tickets left for the Cheetah event!!  
Check out the Reno Balloon Festival and Cheetah Run in September 7-10.

Don't miss this fantastic photo opportunity!  See all details here.


Saturday, June 2, 2012

Chasing the Moon


Celestial Events – Chasing the Huge Full  Moon


Full Moon over Golden Gate

In a couple of my recent Travel TidBits blogs I wrote about the annular solar eclipse on May 20, 2012 and about the super full moon rising on May 5, 2012.  I actually photographed another ‘huge’ full moon setting on the early mornings of April 6 and April 7. On those days, the moon had similar characteristics with a near earth  orbit as described in my May 5 post.  The moon only 'appears' to be ‘huge’ due to the proximity to the earth.

I have only recently started to pay attention to these celestial events but find it fascinating.  Probably a lot of us go through life without ever paying much attention to the sky specifically if you are not an outgoing night person – well I did not feel I missed anything….  But thanks to The Bay Area Night Photography Meet-up group and the Star Circle Academy, I am all of a sudden more intrigued by what’s happening in the sky and willing to stay up or even go out at an ungodly time of 3-4am to watch – not to haul with –the moon.  So this is what I did on April 6: 


It was full moon and the moon was unusually large to its near earth orbit.  It’s a complicated story how to figure out where the moon might be either rising or setting over a landmark to capture an alluring image.  But thanks to Steven Christenson of the Star Circle Academy, I knew that looking west from the Berkeley Marina the moon would set over the Golden Gate Bridge.  With the bridge about 8-10 miles away, the perspective would be such that the moon would appear large relative to the bridge.  But this also meant that a large tele lens would be necessary to capture the setting moon and bridge in that far distance.  For this shoot, I choose the Nikon D7000 camera with the cropped sensor (aiding in the further reach), Nikon 200-400mm lens at full tele, and added a 1.4 teleconverter.  This gave me an effective 825mm tele - allowing for the relative close-up considering the 8-10 miles of distance between the Berkeley Marina and the golden Gate.  The images shown here were taken at ISO 200 with the an aperture of f/7.1 and a shutter speed varying between 3-5 seconds.

Well, armed with all my equipment and tripod and bundled in down jackets and hats and gloves, my friend Lynda and I set out at ~4am on a cold morning of April 6.  By the time we reached the Berkeley Marina a lot of photographers had gathered there to observe and capture the huge moon.  It was good to be early, to select the best place and set up our equipment, and follow the moon on his descend.  As it neared the bridge, the clicking of the cameras was the only sound to be heard.  Everyone as concentrating on settings, eager not to miss the shot since the moon waits for no one.


It was a great experience and finally over a hot cup of coffee, we talked about other possibilities to capture the ‘huge’ moon.  

Well, next morning at 4am, I was on my way to the coast and hoped to photograph the setting moon over Pigeon Point.  It was a clear morning along the coast with only a cloud bank far out over the ocean.  As I set up in the dark – thanks for a camping headlamp well equipped to see what I was doing - the moon was still high in the sky on its path beyond the horizon.  … and then I noticed it that my position would not bring the lighthouse into the path – oh well, too late to change [I hadn't done the complicated calculation .... mentioned above!!] .  But look for yourself, I still had a nice view over the calm ocean, and the morning colors just before sunrise were definitely worth the early trip out to the coast.

The setting full moon over Pigeon Point


Til next time,
Meggi


~~~~~~~~~~~~~~~~~~~~~~~~~~~~~~~~~~~~~~~~~~~~~~


Looking for some fun photography outings, check this out: 

Monday, May 28, 2012

Solar Eclipse on 20 May 2012

Wikipedia writes:

An annular solar eclipse took place on May 20, 2012.   This occurs when the Moon passes between Earth and the Sun, thereby totally or partially obscuring the image of the Sun for a viewer on Earth. An annular solar eclipse occurs when the Moon's apparent diameter is smaller than the Sun, causing the Sun to look like an annulus(ring), blocking most of the Sun's light. An annular eclipse appears as a partial eclipse over a region thousands of kilometres wide. This is also known as Ring of Fire.[1]


An animations of this event can be seen at this link:
http://upload.wikimedia.org/wikipedia/commons/f/f9/Eclipse2012animation.gif


It was the first annular eclipse in the continental US since the solar eclipse of May 10, 1994.


~~~~~~~~~~~~~~~~~~~~~~~~~~~~~~~~~~~~


I had never observed a solar eclipse and so it was a must to go out and see what I could capture.  Although the path from which the full Ring of Fire could be seen - when the moon is 100% obscuring the sun -  was further East, here in the Bay Area we could see the moon partially blocking the sun. 


I choose Treasure Island  in San Francisco Bay to observe this event between 5:30 and 7pm on May 20th and captured the following images showing how the moon 'moved' over the sun.  Each image was taken about 6-8 minutes apart and then put together in post processing.


Using a series of neutral density filters (~6 f-stops) for my camera and protective glasses for my eyes, it was a fascinating experience.  


Super-imposing the series of images onto the San Francisco skyline was just fun - 
done in post-processing.  


Hope you had a chance to observe this extraordinary event.

Til next time,
Meggi

~~~~~~~~~~~~~~~~~~~~~~~~~~~~~~~~~~~~~~~~~~~~~~~~~~~~~~~~~~~

Looking for some fun photography outings, check this out:

  • Wildlife Babies in Montana in July - an amazing opportunity to photograph Wildlife babies in a natural setting.
  • Did you ever want to see cheetahs run at full speed at 60 miles?  Here is a great opportunity right here in California.  Combined with the colorful Balloon Festival in Reno --a perfect photo opportunity is set.